
You need to order a replacement spreader roller, but you're stuck on the supplier's questions about "bow direction" and "mounting orientation." You know it's important, but getting it wrong could mean receiving a component that not only fails to remove wrinkles but actually creates new ones, leading to wasted material, production delays, and a frustrating procurement cycle. To get the right part the first time, you need to clearly communicate your machine's setup in your spreader roller inquiry.
To describe the bow direction and mounting orientation for a spreader roller inquiry, you must provide a simple diagram of your web path. This diagram needs to clearly show the direction of material flow and the position of the spreader roller relative to the incoming web. The peak of the bow must be set perpendicular to the center line of the web as it enters the roller, and the mounting base must allow for this angle to be adjusted during installation for optimal wrinkle removal.
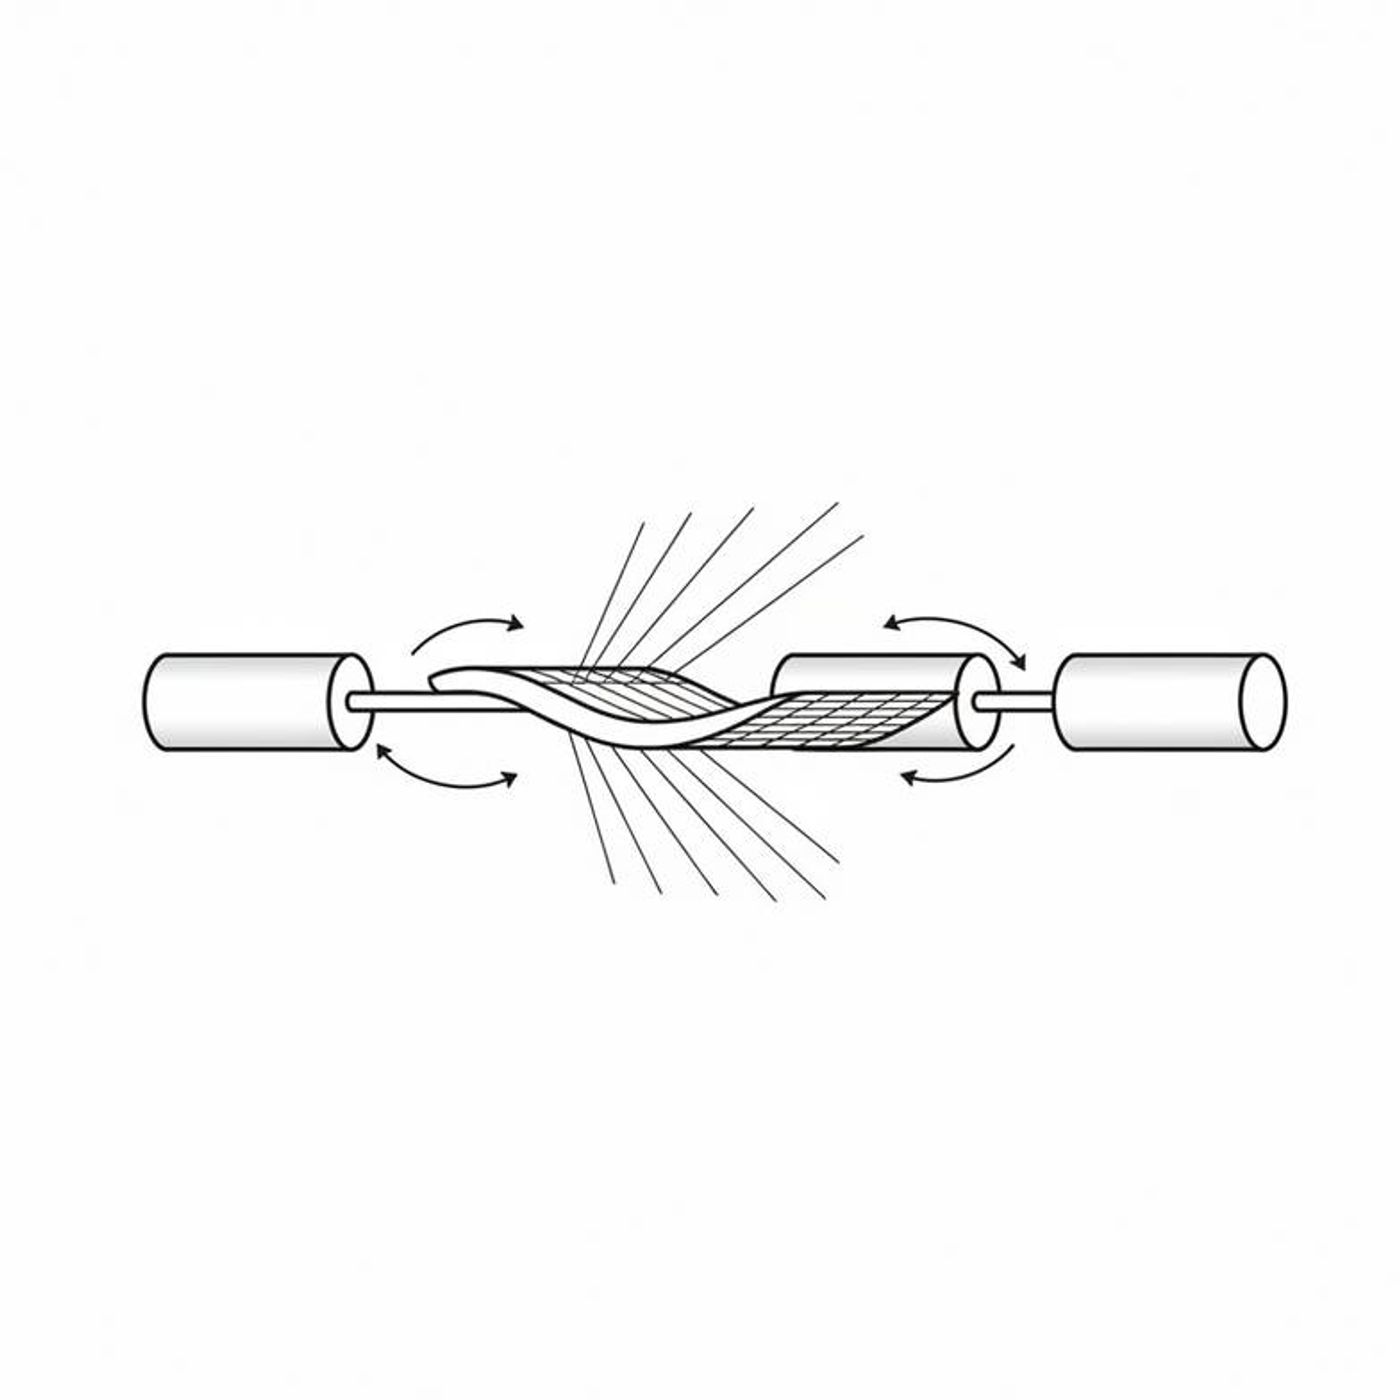
Providing these details isn't just a technical formality; it's the most critical step in ensuring the roller you buy will actually work. But why is a simple photograph often insufficient? Let's dive into what your supplier really needs to see and why it matters so much.
Why Is the Web Path So Important for a Spreader Roller Inquiry?
Are you assuming there's a "standard" or "correct" way to install a spreader roller? It's a common belief, but it can lead to ordering the wrong component. If the bow is oriented incorrectly relative to your material flow, it can cause slack edges, distortions, and tracking problems—the very issues you're trying to solve.
The effectiveness of a spreader roller depends entirely on its relationship with the web path. The orientation isn't universal; it's specific to your machine's layout. A clear understanding of your web path is the foundation of a successful spreader roller inquiry.
Dive Deeper: The Roller, the Web, and the Spreading Action
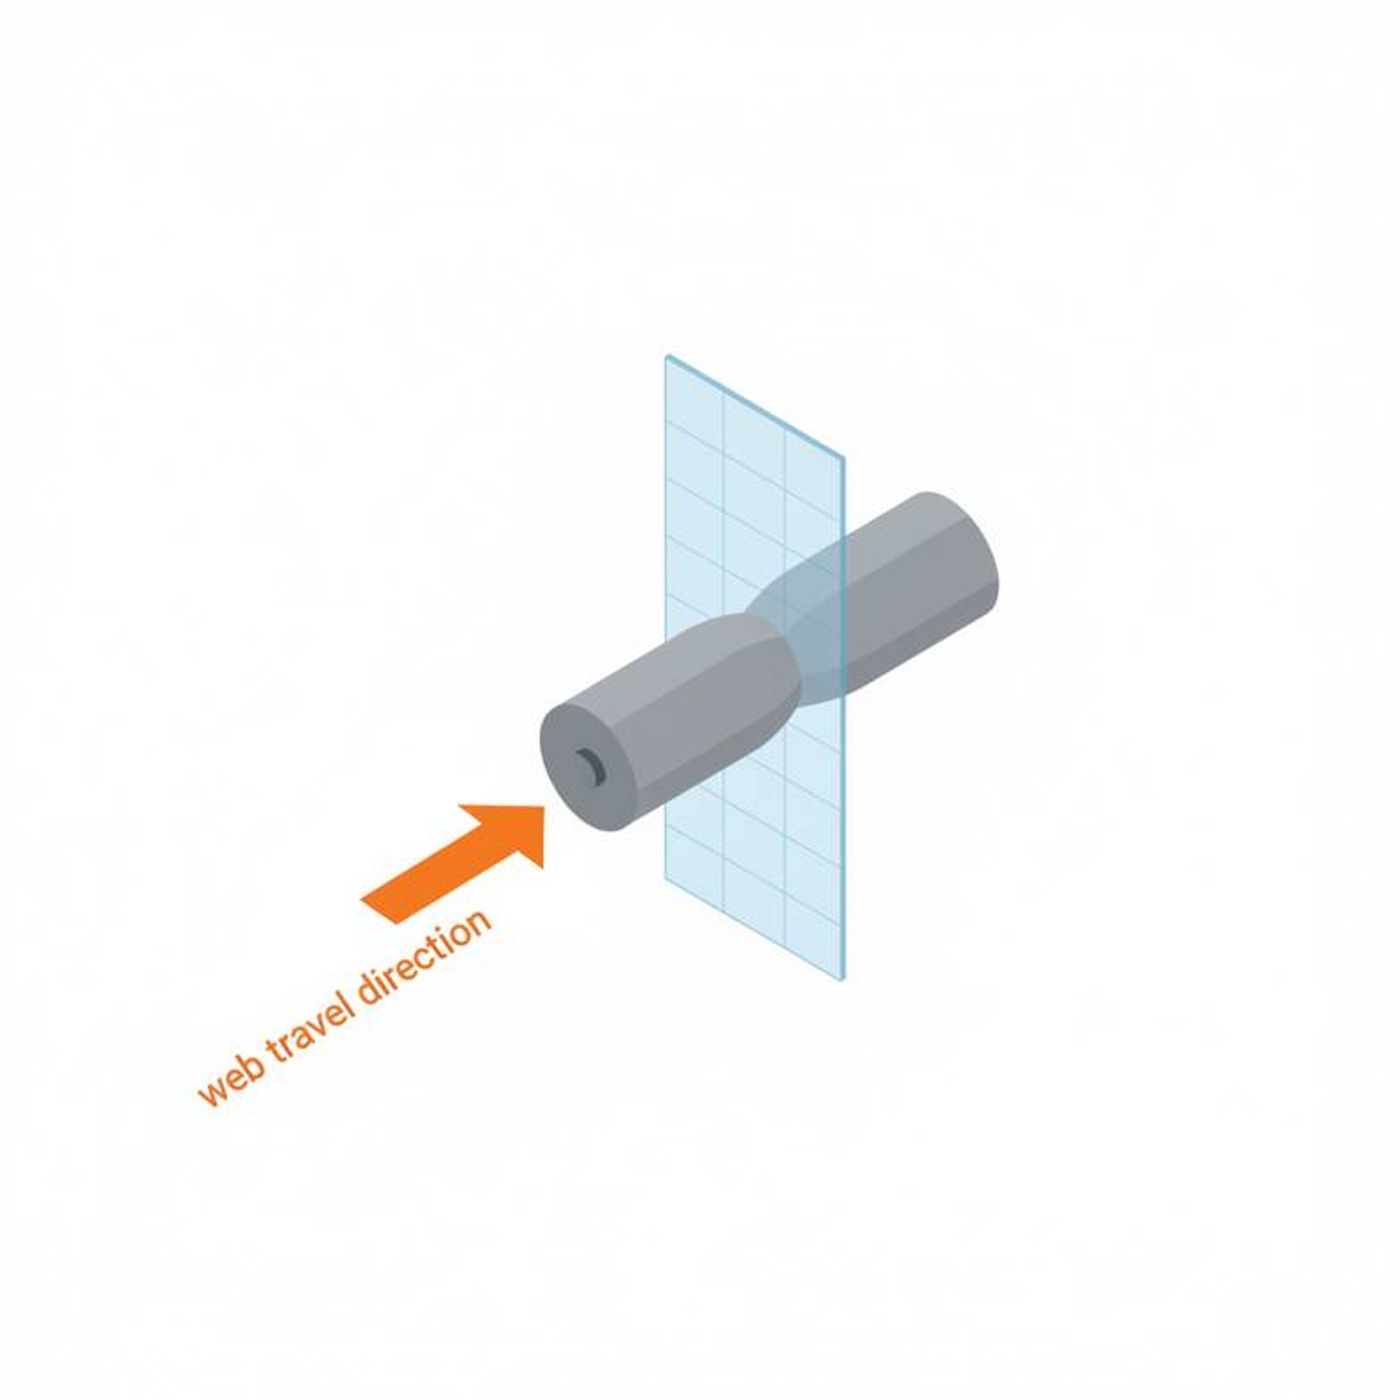
A spreader roller, also known as a bow roller or curved roller, works by creating a longer path for the center of the web than for its edges. As the material travels over the peak of the bow, the center is stretched slightly more, which pulls the web taut from the middle outwards and smooths out any wrinkles or slackness.
For this to work, a few geometric conditions must be met:
- Stable Entry: The web should have a sufficient "lead-in" span before it contacts the spreader roller. A long, stable path allows the roller to do its job effectively. If another roller is too close, it can interfere with the spreading action.
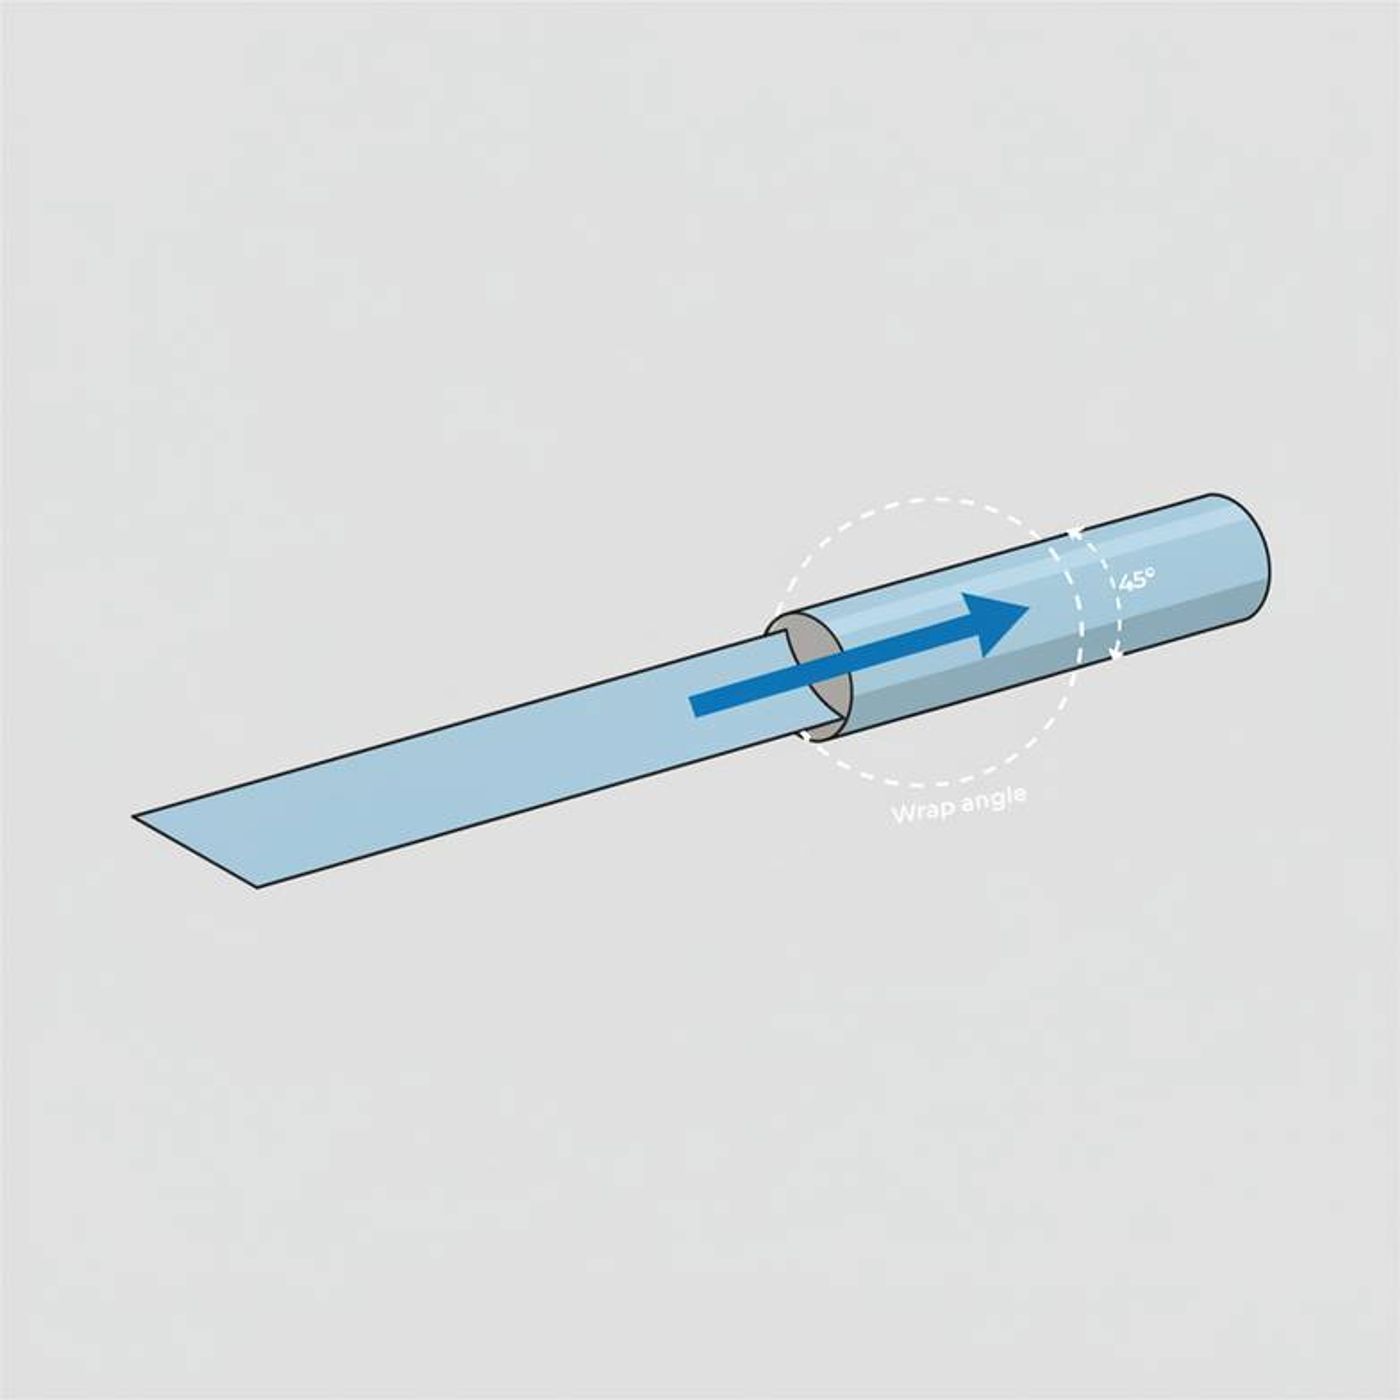
- Sufficient Wrap: The web needs to wrap around the roller enough for the bow to have an effect. A typical wrap angle is between 30 and 90 degrees. Too little wrap, and the roller won't have enough contact to spread the material.
- Perpendicular Alignment: This is the most critical factor. The incoming web must meet the roller so that the bow is perfectly perpendicular (at a 90-degree angle) to the direction of travel.
Think of it like smoothing a wrinkled bedsheet. You wouldn't pull it diagonally; you'd pull it straight out from the center to the edges. A spreader roller does the same thing automatically, but only if it's positioned correctly. If the bow is misaligned, you're essentially pulling one side of the sheet more than the other, which would just create new creases. This is why a simple sketch of your web path is the most valuable piece of information in your spreader roller inquiry.
How Do You Define the Bow Direction Correctly?
You know the roller needs to be "curved," but how do you communicate that curve's direction? Using ambiguous words like "up," "down," "left," or "right" in your inquiry is a recipe for confusion, as these terms depend entirely on the viewer's perspective.
To define the bow direction unambiguously, you need a simple diagram showing the web path bisecting the bow. The key is to illustrate the relationship between the incoming web and the peak (or "apex") of the roller's curve. This removes all guesswork for the supplier.
Dive Deeper: From a Sketch to a Specification
A supplier doesn't need a professional CAD drawing, though they are always welcome. In my experience, a simple, clear, hand-drawn sketch on a piece of paper is perfectly effective. Here’s what it should include:
- Direction of Web Travel: Use arrows to show how the material moves through this section of the machine.
- Adjacent Rollers: Draw the rollers immediately before and after the spreader roller. This helps establish the lead-in and lead-out spans.
- The Spreader Roller's Position: Mark the location where the new spreader roller will be installed.
- The Plane of the Bow: Draw a line representing the peak of the bow.
The 'Plane of the Bow' Explained Simply
The "plane of the bow" is an imaginary flat surface that cuts through the center of the bowed roller, from one end to the other. Your goal is to position this plane so that the incoming web splits it exactly in half. When the incoming web and the outgoing web are on opposite sides of this plane, you achieve maximum spreading efficiency.
Why a Photograph Is Not Enough
We often receive photos from customers with their inquiries. While a photo of the old roller or its mounting position is helpful context, it can't replace a web path diagram. Here's why:
- Perspective Distortion: Camera angles can make it impossible to accurately judge the web entry angle.
- Missing Information: A photo rarely shows the full path, especially the rollers before and after the spreader.
- No Direction of Travel: A static image doesn't indicate which way the web is moving.
A simple sketch solves all these problems. It forces you to think through the geometry and provides your supplier with the exact technical data needed to confirm the specification. It is the single most effective risk-reduction tool you can use when preparing a spreader roller inquiry.
What Does Mounting Orientation Refer to in a Spreader Roller Inquiry?
Are you unsure about the difference between a "foot mount" and a "flange mount"? Getting this detail wrong in your spreader roller inquiry could mean the roller you receive simply cannot be installed on your machine frame.
Mounting orientation refers to how the roller is physically attached to the machine and, most importantly, its built-in ability to be rotated. The mounting base isn't just for holding the roller; it's an adjustment mechanism for fine-tuning the bow angle during installation to achieve that perfect perpendicular alignment with the web.
Dive Deeper: Choosing the Right Mount and Using It Correctly
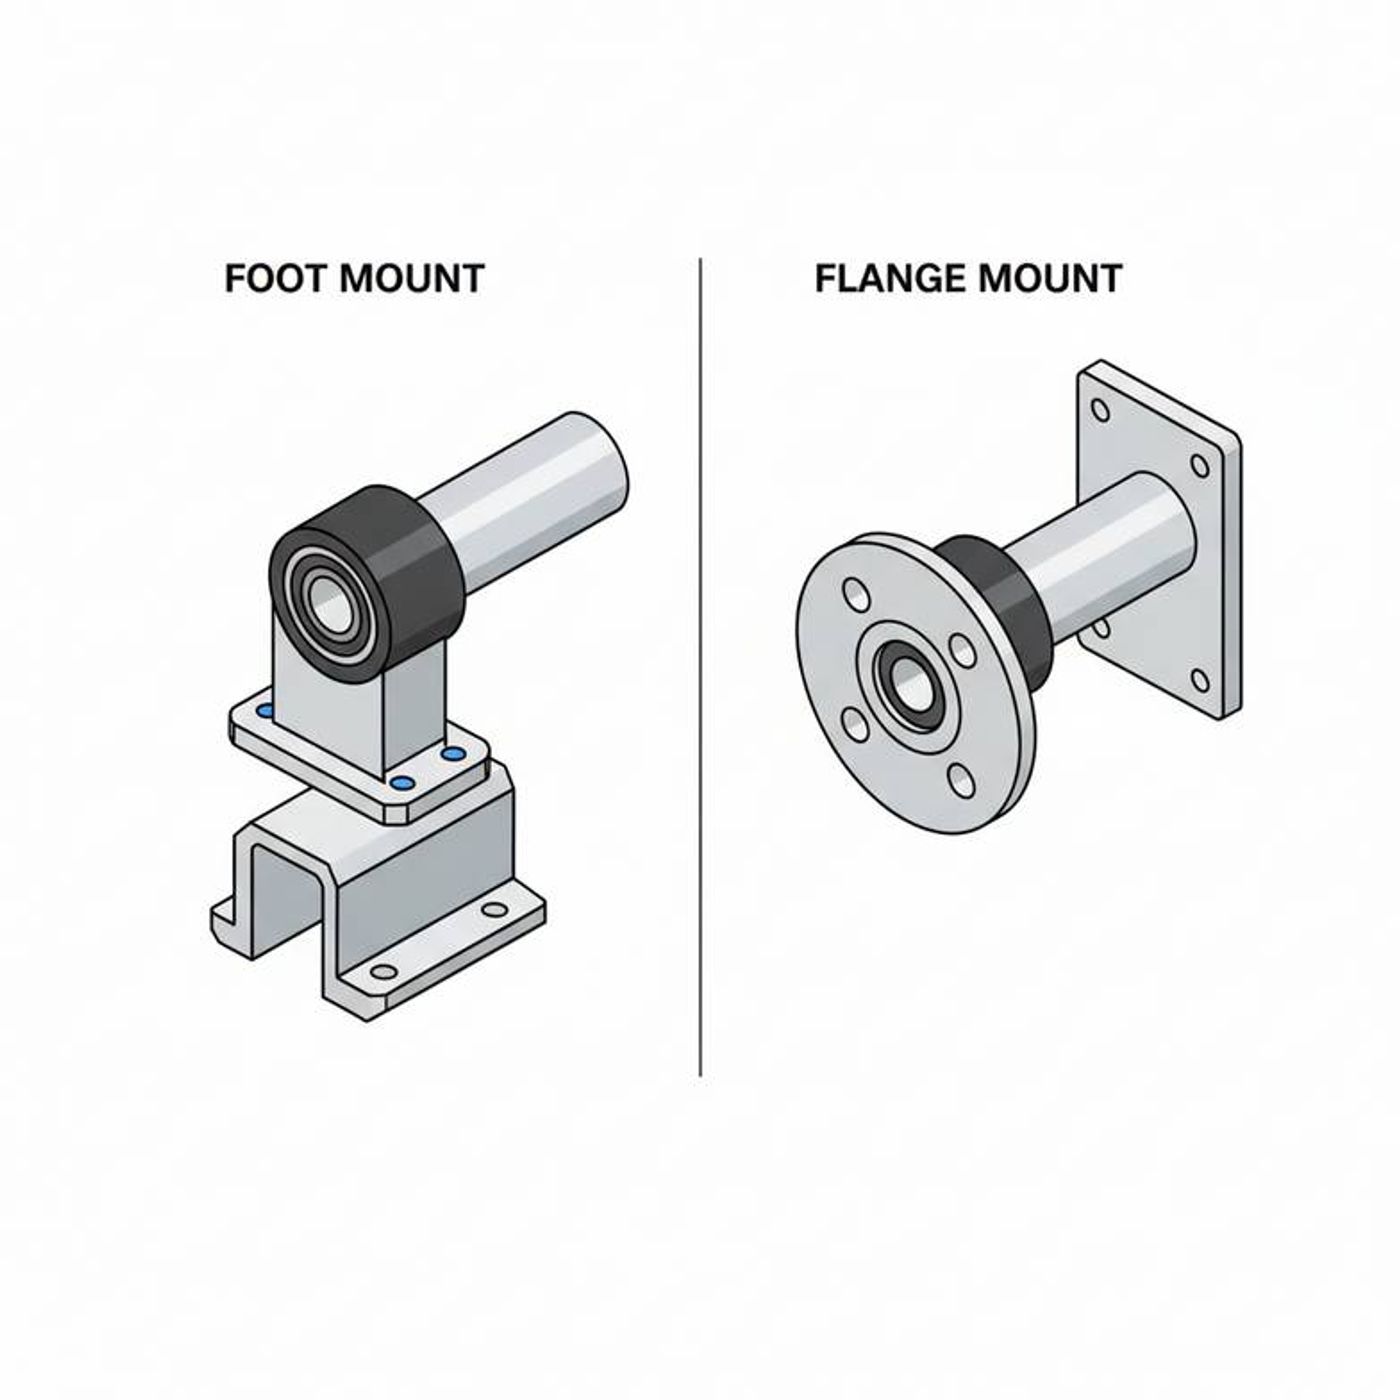
The mounting hardware is just as important as the roller itself. It ensures the roller can be both securely fixed and precisely adjusted. The two most common types are foot mounts and flange mounts.
Foot Mount vs. Flange Mount
- Foot Mount: This is the most common style. The roller's bearing housing is attached to a mounting bracket, or "foot," which is then bolted onto a flat surface on the machine frame. Its key advantage is versatility, as it can be mounted in various positions.
- Flange Mount: In this design, the bearing housing has a circular flange that bolts directly to the side of the machine frame, often fitting into a circular cutout. This can be a more rigid and compact solution but offers less mounting flexibility.
Your choice will almost always be determined by the design of your existing machine. Check how the old roller is mounted or where you plan to install the new one.
The Critical Role of the Adjustable Base
The most overlooked feature of the mounting bracket is its adjustability. On a foot-mounted roller, you will typically find a worm gear mechanism or a set of bolts in curved slots. This is not for initial installation only; it is a critical adjustment tool.
During commissioning, the maintenance team will slightly rotate the entire roller assembly using this mechanism. They will watch the web and make tiny adjustments to the bow angle until wrinkles disappear completely. This fine-tuning is what dials in the roller's performance for your specific material and tension. When you make a spreader roller inquiry, confirming that the mounting bracket includes this adjustment feature is essential.
| Feature | Foot Mount | Flange Mount |
|---|---|---|
| Installation | Bolts onto a flat surface or bracket on the machine frame. | Bolts directly into the machine side-frame, often in a cutout. |
| Adjustability | High. Usually includes a worm gear or slotted base for easy rotation. | Lower. Rotation may be limited or require shims. |
| Flexibility | More versatile for retrofitting onto different machine types. | More integrated and compact, but specific to the machine design. |
| Common Use | General-purpose converting, printing, and packaging machines. | OEM designs where space is tight or rigidity is paramount. |
Frequently Asked Questions
What happens if the bow direction is wrong?
If the bow is misaligned with the web path, it can fail to remove wrinkles or even create new problems. This can include creasing, causing one edge of the web to become slack while the other is tight, or leading to web tracking and guiding issues downstream.
Can I just send a photo of my old spreader roller?
A photo is a helpful starting point, especially for identifying the mounting style. However, it should not be the only information you provide. A simple, hand-drawn diagram of the web path is essential because photos can be misleading about angles and do not show the direction of material travel.
How much should the web wrap around the spreader roller?
A typical wrap angle is between 30 and 90 degrees. The ideal amount depends on your material's elasticity, thickness, and the severity of the wrinkles. A longer, unobstructed lead-in and lead-out span before and after the roller also helps improve its effectiveness.
Do I need to be an engineer to draw the web path?
Absolutely not. You do not need to provide a professional CAD file. A clear, simple sketch made by hand on a piece of paper is perfect. As long as it shows the roller positions and includes an arrow for the direction of web travel, it gives your supplier the information they need.
Conclusion
Successfully ordering the right spreader roller comes down to communicating your specific application clearly. The key is to remember that the ideal orientation is not universal—it is defined entirely by your machine's web path. By providing a simple diagram showing the material flow and the desired bow alignment, you eliminate ambiguity and prevent costly procurement errors. Paired with confirming the correct adjustable mounting style, this information ensures the component you receive is ready to perform. A well-prepared spreader roller inquiry is the foundation for a successful purchase and smooth-running production line.
If you are preparing to order a new or replacement spreader roller, we encourage you to gather these details. Send us your web path diagram and mounting requirements with your inquiry. Our team at DJH Machinery is ready to review your specifications and help you select the exact component for your application.
Continue the Technical Review
For a closer look at the selection and operating questions raised in this guide, read Bow Roller Replacement: Which Dimensions and Mounting Details Matter? and compare the recommendations in Rubber Roller Replacement: What to Specify Beyond Diameter and Length.